![]() Accounts Receivable: Receipts Entry
Accounts Receivable: Receipts Entry
All customer payments (receipts) should be entered in Accounts Receivable. This includes payments against Progress Billings, Trade Invoices and other amounts for which no invoices exist. Trade Invoice payments should not be entered as Progress Billing receipts or vice versa. All payments entered as Progress Billings must be credited to a job. If a payment is entered as a Trade Invoice and not charged to the correct job, or if a payment that should not affect a job is entered as a Progress Billing and is charged to a job, the Financial Status Report and other profitability statements will be incorrect.
Receipts entered for Open Invoice customers will be reconciled to any invoice(s) specified. Receipts entered for Balance Forward customers will be applied to their account without reconciling any particular invoices. Receipts may be entered and posted before the corresponding invoices are entered. When these invoices are subsequently entered, sub-menu options allow reconciliation of these receipts. This screen is accessed through the Accounts Receivable Main Menu. When Receipts is chosen, the following screen comes into view.

Batch Information
Each person who is entering data is assigned their own file or Batch. The Invoices included in each Batch are listed to the right. All Batches are listed. See Batch Management
Deposit Tickets for Tagged Receipts (button)
Press this button to print a deposit ticket for receipts in the tagged batches. If all receipts are being deposited to the same cash account, only one ticket will be printed. The deposit ticket will print all the deposit information, including a MICR-encoded line containing the bank routing and account numbers (provided these have been entered through the GL Account Enty program).

Select the desired deposit ticket format. If pre-printed forms have been purchased, select the option to "Fill In Fields on Pre-Printed Form" and use the "Nudge Down" option to reposition the printing if needed. Click here to see a sample of the deposit ticket.
Proof List Tagged Receipts (button)
Press the Proof List Tagged Batches button and the Invoice Proof Listing screen comes into view.
Post Tagged Receipts (button)
This Batch is in Use by another user" message
This message will come into view anytime there is someone in the Batch or the accounting system is shut down improperly.

If this message occurs and there is someone in the Batch, press the OK button. If this message occurs and there is no one in the Batch, press the letter "O" key and it will override this message and allow access to the Batch.
Reconcile Posted Receipts (button)
If receipts were entered and posted before their associated invoices were entered, these previously entered receipts may be reconciled through this button. Highlight the customer number and the number of the receipt to be reconciled. Receipt information will be displayed as in the Invoice/Billing Receipts entry screen. Receipts may be reconciled in the same manner as regular payments are reconciled. For more information, see Reconcile Posted Receipts.
Unreconcile Receipts (button)
If it is desirable to unreconcile receipts that have been previously entered, posted and reconciled, press this button. Warning: this will permanently unreconcile the tagged receipts. For more information, see Unreconcile Receipts.
Click this button to print a hard copy of the receipt to give to the customer. This will show the amount received and a list of the invoices reconciled by the receipt. When the button is pressed, the following confirmation window will appear:

Select whether the system should print the highlighted receipt or all receipts in the highlighted batch. Click here to see a sample of a printed receipt.
Lien Release (button)
When this button is pressed, a Lien Release record is created for the highlighted receipt. More information about Accounts Receivable Lien Releases can be found in the Customers topic.
Unposted Receipts in Highlighted Batch
All receipts are shown under the heading Unposted Receipts. The Add, Change, and Delete buttons under the same heading are used for entering and deleting receipts. The customer name and number along with receipt information for each Unposted Receipt are listed.
Press the Add button and the following screen comes into view. Choose the desired receipt button.

To change a receipt, highlight the desired entry and press the Change button. The highlighted receipt will come into view. For more information, see Change an Invoice/Billing Receipt or Changing a Miscellaneous Receipt.
Press the Delete button and the following screen comes into view. Press the Yes button and the highlighted report will be deleted. If the No button is pressed, the program returns to the previous screen.

This button closes the program and returns to the main screen.
Invoices missing in receipt entry
When an invoice is missing in receipt entry, press the <CTRL>, <ALT> and <R> keys (at the same time) at this main receipt entry screen. This will clear all open invoices for entry of receipts. The following message will come into view. To clear all open invoices press the Yes button. Note: There can be no unposted receipts when this process is performed. The program will not proceed.

Posting receipts performs two functions. First, it reconciles the invoice records to which the receipts have been assigned. Second, it makes all General Ledger transactions associated with the receipts. Any posting procedure done in the accounting system is non-reversible except by reversing each transaction out individually through all affected modules. It is important to always make a backup of all data files prior to any posting procedure.
Press the Post Receipt button and the following screen comes into view.
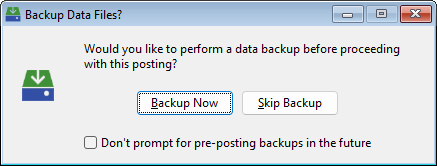
Backup Now
Click Backup Now button and the Utilities Backup/Restore screen will come into view.
Skip Backup
Click the Skip Backup button to skip the backup and continue to the next screen.
Don't prompt for pre-posting backups in the future
Check this box to turn this prompt off for future postings. To turn the prompt on again, see Setup: Preferences.

All receipts in the Unposted Receipt column will be posted to the specified fiscal period. Press the lookup button and the Fiscal Period Screen comes into view. Choose the correct period and press the Select button.
Select the Fiscal Period to which the invoices should be posted and press the Proceed with Posting button. The system will post the receipts in the tagged Batches. As the receipts are posted, the system will generate two reports, the A/R Receipts Posting and the G/L Summary of Receivables Posting. See Printing Reports for more information. After the receipts are posted and the reports are generated, the following message will come into view.

Finish (button)
Press the Finish button to make the posting permanent.
Undo (button)
Press the Undo button to return all accounting data to the conditions prior to posting.
Add or Change an Invoice/ Billing Receipt
The following screen comes into view when the Invoice/ Billing Receipts button is chosen from the Add Menu or an Invoice Billing/ Receipt is highlighted and the Change button is pressed.

Customer Number
If the Add button was pressed,this field will be available. Enter the number of the customer from whom payment was received, or press the lookup button and the Customer Entry screen comes into view. Highlight the desired record and press the Select button. The system will display the customer name and number. If the Change button was pressed, the customer number and name are not changeable from this screen.
To view the address of the customer, press the More button and the following screen comes into view.

Print Envelope/Label (button)
Click this button to immediately print an envelope or a mailing label for this address. See the Printing Envelopes and Labels help topic for more information.
Deposit Reference Number
Enter the number of the deposit slip deposited with this payment. This number is informational only and is not required by the system.
Checking Account
Enter the checking account number to which the receipt should go. The lookup button may be used to display all checking account numbers, and the desired account may be selected from the list.
Receipt Date
Enter the date of the receipt.
Check Number
Enter the check number, up to ten characters.
If the customer wishes to pay for posted invoices with a credit card, the credit card information can be entered and processed here.
If a credit card processing account has been established, the credit card processing window will appear and allow for entry of a card number and on-line processing of the payment.
Job Billing Receipt (check box)
If this box is checked, three fields will be available: Job ID, Net Amount Received, and Retention Received. Otherwise, the Amount Received and Discount Taken fields will be available.
|
Example: |
Job Billing Receipt box unchecked |
Job Billing Receipt box checked |
|
|
|
|
Job ID
Enter the number of the job, or press the lookup button and the Job Setup screen will come into view. Highlight the desired Job ID and press the Select button.
Amount Received
Enter the amount actually received.
Discount Taken
Enter the amount of discount taken, if any.
Credit Card Fee
A Credit Card Fee may be entered here. When the receipt is posted, the amount entered here will be Debited to the Cash Account Credited to the system account for Credit Card Fees Collected, as assigned in the Accounts Receivable Setup Options window. Any amount in this field will NOT be included in the amount to be reconciled to invoices.
![]() Refresh Received Amounts (button)
Refresh Received Amounts (button)
Click this button to reset the received amount to be equal to the received amounts assigned to the invoice line items in the list box below.
All unpaid invoices for this customer will be displayed beneath this heading. The system will assume that payment is being made on the oldest invoice(s) and automatically distribute the amount received to the oldest first, and then to subsequent invoices. If the customer has specified the invoice number(s) to which payment should be applied, the payment may be applied to those invoices. If the customer is a Balance Forward type, this invoice reconciliation does not apply and this portion will be skipped. If unreconciled invoices are found, the system will display the Invoice Number, Job Number, Gross Amount, Discount Amount, and the number of days until the Discount Expiration.
If the Job Billings box was checked, Reconciliation Information will have the following columns.
![]()
Retention
The amount of retention withheld on this billing is displayed in this column.
Payment Data
Amounts entered for Received and Retention Received will be distributed here beside the invoices displayed. They will be distributed to the oldest invoice first.
If the Job Billings box is unchecked, Reconciliation Information will have the following columns.
![]()
Payment Data
Amounts entered for Received and Discount Taken will be distributed here beside the invoices displayed. They will be distributed to the oldest invoice first. Discount amounts will not be distributed to invoices with expired discounts.
Inv. # Search
Enter the number of the invoice to be found. The system will search for the invoice and will jump to it when found.
Overpayment Handling
When the OK button is pressed, the system checks to make sure the entire receipt amount has been reconciled to outstanding invoices. If any portion of the receipt amount was not reconciled, this window will appear:

These unreconciled amount can be treated using any of three methods.
Credit the Amount to the Customer (radio button)
If this button is selected, the unreconciled amount will be credited to the customer and will show up as a credit on Aging Lists and Statements. The operator can reconcile these amounts to open invoices at a later time by selecting the Reconcile Posted Receipt button from the Receipt Entry Screen.
Refund the Money (radio button)
If this button is selected, the following prompt will appear:

This process will create an Instant Check in the desired General Ledger Transaction batch for the amount of the overpayment. The Instant Check can then be proof listed and posted through the General Ledger > Transactions menu item.
Increase the Invoice Amount (radio button)
If this button is selected, the following prompt will appear:

This option assumes the payment is correct, but the originally entered invoices was too low. Tag the invoice that should be increased in value and click proceed. When the receipt is posted, an additional invoice for the difference will be created and posted as well.
Press this button if it is necessary to manually reconcile invoices or to apply a single payment to selected invoices, either as full payment or as partial payment. The following screen comes into view when the button is pushed. The Net Amount to Reconcile and Retention Received information can be entered in the appropriate field.

Net Amount to Reconcile
This is the amount to be applied to the Invoice, not the Retention.
Retention Received
This is the amount to be applied to Retention, not the Invoice.
Attachments (tab)
Press the Attachments tabs and the following screen comes into view. This tab allows the user to attach outside files to the receipt. For example: a scanned copy of a letter received regarding the receipt a can be attached.

See the Attachments topic for a full description of how attachments work.
Notes (tab)
The Notes tab allows the user to enter notes for the selected receipt. When the Notes tab is selected, the following screen comes into view.

An unlimited number of Notes can be attached to any receipt..
Add or Change (button)
See Adding or Changing a Note.
Print (button)
See Printing Notes.
Add or Change a Miscellaneous Receipt
The following screen comes into view when the Miscellaneous Receipts button is pressed on the Add Menu or a Miscellaneous Receipt is highlighted and the Change button is pressed.

Non Customer (radio button)
If the source of the receipt is from a Non-Customer, check this radio button and the following field will become available. Enter the name of the receipt source.
Existing Customer (radio button)
If the source of the receipt is from a Customer, check this radio button. The following field will be available. There are four options for entering the name of the customer.
1. Enter the customer number.
2. Use the lookup button and the Customers screen will come into view. Highlight the desired customer and press the Select button.
3. Enter the customer name.
4. Use the down arrow to select the customer name from the pull down list.
If the selected customer has open invoices, it may be better to enter an Invoice/Billing Receipt instead of a Miscellaneous Receipt. If the system detects any open invoices for the selected customer, the folowing will be displayed:

This message shows all open invoices for this customer and suggests that the user may want to enter an Invoice/Progress Billing Receipt instead of a Miscellaneous Receipt so that receipt amounts can be applied against open invoices.
Amount Received
Enter the amount actually received.
Deposit Reference Number
Enter the number of the deposit slip deposited with this payment. This number is informational only and is not required by the system.
Checking Account
Enter the number of the checking account number where the receipt will be applied. Use the lookup button to view a list of all accounts and then select from the list. This number is informational only and is not required by the system.
Receipt Date
Enter the date of the receipt.
Check Number
Enter the check number, up to ten characters.
Card (button)
See the Card (button) definition under entering Trade Invoice/Progress Billing Receipts.
Credit Card Fee
A Credit Card Fee may be entered here. When the receipt is posted, the amount entered here will be Debited to the Cash Account Credited to the system account for Credit Card Fees Collected, as assigned in the Accounts Receivable Setup Options window.
Credit Type
The Credit Type chosen will influence the next field. There are 2 choices: G/L Account and Job.
|
|
Choose G/L Account. if the credit type is to be credited to a G/L Account. |
|
|
Choose Job, if the credit type is to be credited to a specific Job. |
|
|
Choose Job/Cost Code if the credit type is to be credited to a specific Job and Cost Code. |
Credit Account
Enter the General Ledger Account number, or press the lookup button and the Enter Account screen comes into view. Highlight the desired account and press the Select button.
Job ID
Enter the Job ID number, or press the lookup button and the Job Setup screen comes into view. Highlight the desired job and press the Select button.
Press the Attachments tabs and the following screen comes into view. This tab allows the user to attach outside files to the invoice. For example: a scanned copy of a letter received regarding the receipt a can be attached.

See the Attachments topic for a full description of how attachments work.
Notes (tab)
The Notes tab allows the user to enter notes for the selected receipt. When the Notes tab is selected, the following screen comes into view.

An unlimited number of Notes can be attached to any receipt..
Add or Change (button)
See Adding or Changing a Note.
If receipts were entered and posted before their associated invoices were entered, these previously entered receipts may be reconciled through this screen. Receipt information will be displayed as in the Invoice/Billing Receipts entry screen. Receipts may be reconciled in the same manner as regular payments are reconciled. The following screen comes into view when the Reconcile Posted Receipts button is chosen.

After the Receipts are reconciled, press the Close button and the process will be completed. Once the Close button is pressed and the receipts are reconciled, it is not reversible.
Unreconcile Selected Receipt
Highlight the desired receipt and press this button. This will return the receipt to its original status.
Reconcile Selected Receipt
Highlight the desired receipt and press this button. The following screen will come into view. This screen is the same as the Add or Change Receipt screen except the Receipt information has already been entered in and may not be modified. The only information that may be changed from this screen is the Receipt Information and the Reconciliation Information. See Add or Change Invoice/Billing Receipts for more information about this screen.

This option allows for previously posted and reconciled receipts to be unreconciled from their associated invoices. The following screen comes into view when the Unreconcile Receipts button is chosen. All posted invoices are listed on the screen.

Limit by Customer Number (check box)
All posted invoices are listed on this screen. To view ONLY those invoices for the customer(s) selected, check the 'Limit by Customer Number' box.
From: Enter the number of the first company whose invoices are to be viewed. Press the lookup button to see a list of all customers in the system.
To: Enter the number of the last company whose invoices are to be viewed. Press the lookup button to see a list of all customers in the system.
The customers and their associated invoices will appear in numerical order.
Highlight the specific invoice(s) to be tagged. Press the Tag button to select the invoice(s) to be unreconciled.
Press the Tag All button to select all the invoice(s) to be unreconciled. Caution: If the invoices on the screen have not been limited through the Limit by Customer Number check box, all the posted invoices in the system will be tagged to be unreconciled.
Press the Untag All button to deselect or untag all invoices previously selected for unreconciliation.
Press the Unreconcile Tagged Invoices button to unreconcile posted receipts from the tagged invoices. The following caution screen will come into view.

The process of unreconciling the tagged invoices is a permanent one. Be certain that unreconciling these invoices is desired. The only way to reverse the process is to reconcile again each of the invoices. If the No button is pressed, the message will disappear and the tagged invoices will not be affected. If the Yes button is pressed, the tagged invoices will then be unreconciled; a small screen which reads "Process Complete" will come into view indicating the process was completed successfully.
Report Description - A/R Receipts Posting
The A/R Receipts Posting lists the reference number, customer name, deposit reference and receipt information. For Open Item customers, reconciliation information for the invoice and/or job number is also listed. Any amounts not applied to invoices will be listed as ‘Not Reconciled’ and will be applied as a credit to the customer’s account upon posting. If partial amounts are paid on invoices, the remaining balance for each invoice is listed.
A summary of the receipts posting is printed showing total receipts, retention received, discounts taken, and discounts allowed.
Report Description - G/L Summary of Receivables Posting
The G/L Summary of Receivables Posting is a summary of the posting procedure. Receipts are posted in summary to the General Ledger and maintained in the ‘History File’ in condensed form. The summarized information is printed for each receipt. All transactions associated with a receipt will print in sequence.
The reference number is the General Ledger transaction number. The description for progress billings will show the receipt number, the designation ‘PB.’ for ‘Progress Billing’ and the customer name and number. The description for ‘Retention Paid’ will show the receipt number, the designation ‘Ret.’ for ‘Retention’ and the customer name and number. The description for trade invoices will show the designation Receipts: A/R Trade. The description on the last line shows the designation Receipts: Total Recv to indicate total receivables posted. The period number and date of posting will be displayed for each transaction. The check number will be displayed if applicable. The journal ID and number will be displayed. All transactions from the Receipts Entry Posting are given the journal ID of C/R, standing for Cash Receipts. The control account and subsidiary account for each transaction are listed. In the case of progress billings and retention, the job number is listed for the subsidiary account.
Report Sample - A/R Receipts Posting

Report Sample - G/L Summary of Receivables Posting

Report Sample - Printed Receipt

Report Sample - Deposit Ticket


