![]() Print Purchase Order Listing
Print Purchase Order Listing
After Purchase Orders have been entered into the system, a proof listing may be printed at any time regardless of whether the Purchase Order has been generated or reconciled. The main purpose of the listing is to allow reviewing of all entries before the actual Purchase Order is generated.
Select the Print Purchase Order Listing option from the Purchase Order Main Menu.and the following screen will come into view.

Click on any column header to sort the listed items. This will be useful when the list of reports has grown.
Add or Change (button)
To modify the information used in generating the report, press the Add button or highlight the desired report title and press the Change button. For more information, see Add or Change a Purchase Order Listing.
Press the Delete button and the following screen comes into view. Press the Yes button and the highlighted record will be deleted. If the No button is pressed, the program returns to the previous screen.

To print a report, press the Print button. For more information, see Printing Reports.
Report Description: Purchase Order Listing
Report Sample: Purchase Order Listing
Note: If the message "Nothing to Print"comes into view when the Print button is pressed, there are two main causes:
A. There is no information within the selected limits. Remove all limits, then reinsert the limits one at a time. If the report still will not print, insert a new report title.
B. No report title is selected. The report title is used to store the selected limits. A report title must be selected in order for the report to print.
This button closes the program and returns to the main screen.
Help (button)
see How to use Help
Add or Change a Purchase Order Listing
To Add or Change a report, press the appropriate button and the following screen will come into view. This screen displays the possible limits that may be set. No limits should be set if a complete listing of every transaction in the Posted Transaction File is desired. Several limits may be set to narrow the list down to a very small range of transactions.

The following is a description of each of the limits. Check the appropriate boxes and enter the desired limits. When all desired limits have been set, press the OK button to save the settings. Press the Cancel button to return to the browse screen without saving the settings.
Report Title
The title of the report. Warning: The title is used to store the selected limits
User
Enter the User ID of the report creator.
Lock (check box)
If this option is selected, only the User listed in the User field can change or delete this report.
In this section, limit the report to just the desired purchase orders.
All, Range, List (radio buttons)
Select the All radio button to print all purchase orders. Select Range to enter a range of PO Numbers in the From and To fields. Select List to report on a list of selected purchase orders.
These fields will be available if the Range radio button is selected.
From
Enter the first desired PO Number or press the lookup button and the Purchase Order Browse window comes into view. Select the desired purchase order from the list.
To
Enter the last desired PO Number or press the lookup button and the Purchase Order Browse window comes into view. Select the desired purchase order from the list.
Edit Purchase Order List (button)
Click the button to add or remove purchase orders from the list of purchase orders to be included in the report. The following screen will come into view.

Available Records
All available purchase orders that are not included in the list are displayed in these columns.
Included Records
All included purchase orders are listed in this column. Use the arrows to move selected records or all records between the Available and Included areas.
This section allows the selection of Vendors for which the report should be printed.
All, Range, List (radio buttons)
Select the All radio button to ignore Vendor reporting limits. Select Range to enter a range of Vendors in the From and To fields. Select List to report on a list of selected Vendors.
These fields will be available if the Range radio button is selected.
From
Enter the vendor number (name) or press the lookup button and the Vendors screen comes into view.
To
Enter the vendor number (name) or press the lookup button and the Vendors screen comes into view.
Edit Vendor List
Click the Edit Vendor List button to add or remove Vendors from the list of Vendors to be included in the report. The following screen will come into view.
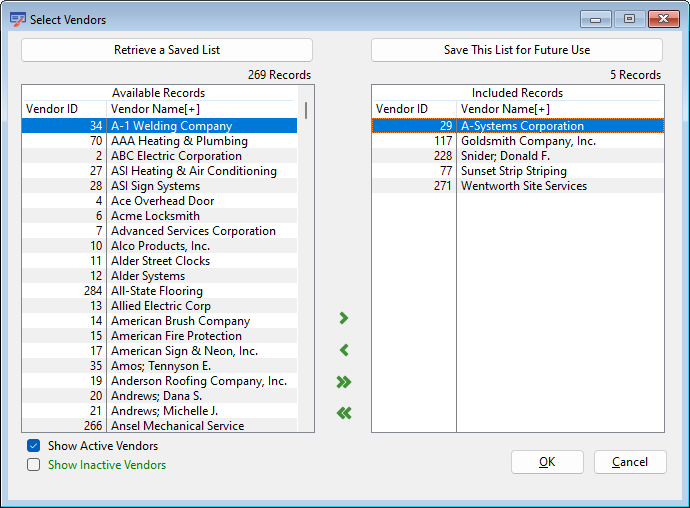
Available Records
All Available Vendors that are not included in the list are displayed in these columns.
Included Records
All Included Vendors are listed in this column. Use the arrows to move selected records or all records between the Available and Included areas.
Purchase Orders will print according to their reconciliation status. The choices are Unreconciled, Partially Reconciled with Pack Slip, Fully Reconciled with Pack Slip, Partially Reconciled With Invoice, Fully Reconciled With Invoice. In this section, the user can also indicate whether to Include Reconciliation Detail, and whether to Show Overreconciled as Negative Open Amount . Check the appropriate box(es).
Detailed (radio button)
This will print all information about each listed purchase order.
Omit Line Items (radio button)
This will print all the same information as the Detailed format with the exception of the line item detail.
Summary (radio button)
This will print just a summarized view of the listed purchase orders.
Purchase Orders can be further limited by selecting this limit. The whole Purchase Order may be printed or just the line items.
Whole PO's Only (check box)
If this limit is selected, only whole Purchase Orders will be printed.
Lines within Limits (check box)
If this limit is selected, any line items which are within the specified limits will be printed.
Choose the desired sort order from the listed radio buttons.
Purchase Orders may be limited according to one of the dates on the Purchase Order. This limit allows the selection of the date type and the range of dates for which Purchase Orders should be listed.
Date Limit Type (pull-down list)
Select "No Date Limit" if POs for all dates are to be included; otherwise, select the date limit type from the list. The available dates are Issue Date, Acceptance Date, Expected Delivery Date, Deadline Date and Approval Date. If one of these date types is selected, the date range fields will be enabled. To limit Purchase Orders to a particular range of dates, enter the first and last dates of the desired range. To limit Purchase Orders to a single date, enter that date in both the From and To fields.
From
Selects the first date in a range of dates or a single date. Enter the date or press the lookup button and a Calendar will come into view. Highlight the correct date and press the OK button.
To
Selects the last date in a range of dates or a single date. Enter the date or press the lookup button and a Calendar will come into view. Highlight the correct date and press the OK button.
This field allows the selection of a piece of equipment or a range of equipment. If the Select Equipment box is not checked, all the pieces of equipment will be listed.
Select Equipment (check box)
Activates the ranges which are defined on the next lines. To select only one piece of equipment, check this box and enter that number in both the From and To fields.
From
Selects the first piece of equipment in a range of equipment or a single piece of equipment. Enter the Equipment ID number or press the lookup button and the Equipment File Maintenance screen comes into view.
To
Selects the last piece of equipment in a range of equipment or a single piece of equipment. Enter the Equipment ID or press the lookup button and the Equipment File Maintenance screen comes into view.
Portrait (radio button)
Specifies how the report is positioned on the page when printed. Portrait is the standard. Portrait is printed vertically.
Landscape (radio button)
Specifies how the report is positioned on the page when printed. Landscape is printed horizontally.
Purchase Orders are limited according to their types. The choices are Job, Non Job, or Both. Check the appropriate radio button.
Job (radio button)
Check this radio button to print job Purchase Orders.
Non Job (radio button)
Check this radio button to print non job Purchase Orders. Non Job Purchase Orders are general ledger transactions.
Both (radio button)
Check this radio button to print both job and non job Purchase Orders.
Use this section to limit the report by Job. Use the Range setting to set a range of Job ID numbers. Use the List setting to specify a list of Jobs to be included.
All, Range, List (radio buttons)
Select the All radio button to ignore Job reporting limits. Select Range to enter a range of Jobs in the From and To fields. Select List to report on a list of selected Jobs.
These fields will be available if the Range radio button is selected.
From
Selects the first job in a range or a single job. Enter the number or press the lookup button and the Job setup screen comes into view.
To
Selects the last job in a range or a single job. Enter the number or press the lookup button and the Job setup screen comes into view. Highlight the desired record and press the Select button.
Edit Job List (button)
If the List radio button is selected, this button will be available. The following screen will come into view when the Edit Job List button is pressed.

Use the arrows to move Jobs from the Available list to the Included list. All Jobs in the Included Records section will be included on the report. Use the tabs to sort each section by Job Number or by Job Name.
This section allows for the selection of specific Cost Codes for which the report should be printed.
All, Range, List (radio buttons)
Select the All radio button to ignore Cost Code reporting limits. Select Range to enter a range of Cost Codes in the From and To fields. Select List to report on a list of selected Cost Codes.
These fields will be available if the Range radio button is selected.
From
Selects the first cost code in a range of codes or a single code. Enter the number or press the lookup button and the Cost Code screen comes into view. Highlight the desired code and press the Select button.
To
Selects the last cost code in a range of codes or a single code. Enter the number or press the lookup button and the Cost Code screen comes into view. Highlight the desired code and press the Select button.
Edit Cost Code List (button)
Click the Edit Cost Code List button to add or remove Customers from the list of Customers to be included in the report. The following screen will come into view.

Available Records
All Available Cost Codes that are not included in the list are displayed in these columns.
Included Records
All Included Cost Codes are listed in these columns. Use the arrows to move selected records or all records between the Available and Included areas.
Click this button to save the current settings and print the report immediately, without having to return to the Report Title browse window.
Report Description - Purchase Order Listing
The Purchase Order Listing will show the limits set for this printing. The limits appear at the top of each page of the listing.
Reference #
The reference number for each Purchase Order will appear in this column.
Vendor Information
The vendor name, number and address are printed in this column.
Purchase Order
The Purchase Order number, issued date and delivery date will appear in this column.
Item Number
The line item number on the listing corresponds to the line item number used during entry.
Item ID
The item I.D. on the listing corresponds to the item I.D. used during entry.
Description
The description on the listing corresponds to the description used during entry. Note, however, that if two lines of text are entered on a single line item during Purchase Order entry, only the first line of text will appear on the listing.
Quantity
The quantity on the listing corresponds to the quantity used during entry.
Units
The unit description on the listing corresponds to the unit description used during entry.
Unit Price
The unit price on the listing corresponds to the unit price used during entry.
Amount
The amount on the listing corresponds to the amount used during entry.
Account
This column will display the General Ledger account for non-job items. Job items are indicated by the letter ‘J’ followed by the job number. For example: an item billed to Job 111 would appear as ‘J 111.’
Total
The total for the listed Purchase Order items will appear below each Purchase Order.
Grand Total
The grand total for all items listed will appear at the end of the listing.
Report Sample - Purchase Order Listing
