![]() Equipment Costing: Equipment Setup
Equipment Costing: Equipment Setup
The Master Equipment File is maintained through the Equipment option. Each piece of equipment to be tracked must be entered through this program. Once a piece of equipment is entered, the desired equipment categories may be assigned and/or edited.
This screen can be accessed through Equipment on the Equipment Costing Main Menu. The following screen comes into view.
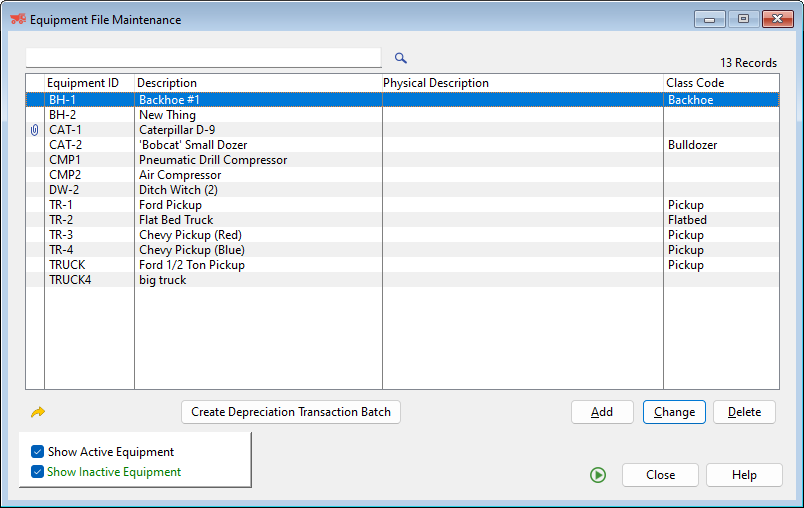
Browse Field
Enter the desired Equipment ID number in this field and the system will automatically search for the matching record. Press the lookup button to search for specific keywords. The following screen will come into view when the lookup button is pressed.
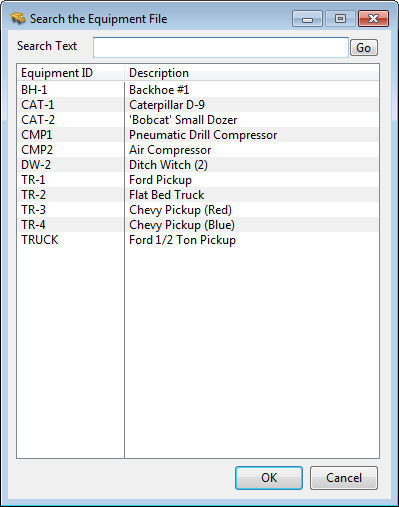
Enter one or more keywords in the blank field and press the Go button. The accounting system will return all pieces of equipment whose Equipment ID or Description contains the entered keywords. Select the desired piece of equipment and press the OK button.
The tabs are for sorting the information by Equipment ID and by Description.
Add or Change (button)
see Add or Change a Equipment Record
Create Depreciation Transaction Batch (button)
Click this button to create a batch of GL Transactions to depreciate the value of equipment. See Fixed Assets for more information.
Press the Delete button and the following message comes into view. Press the Yes button and the highlighted record is deleted.

This button closes the screen.
Help (button)
see How to use help
Show Active Equipment (check box)
If this option is selected, Active Equipment will be listed in black.
Show Inactive Equipment/Terminated Employees (check box)
If this option is selected, Inactive Equipment will be listed in green.
Add or Change an Equipment Record
Press the Add or Change button and the following screen comes into view.
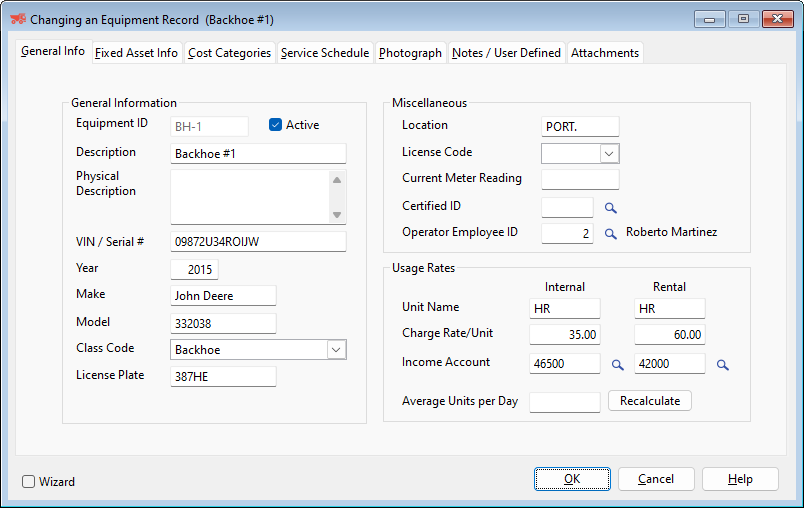
Equipment ID
Each piece of equipment is assigned an ID number from one to ten characters in length. The ID may be any alpha-numeric or other keyboard character. Enter the ID number for the piece of equipment.
Active (check box)
Check this box if the piece of equipment is currently in use.
Description
The description of the equipment may be up to thirty characters long and may be comprised of any keyboard characters, numeric, alphabetic or other. For example: Backhoe #1.
Physical Description
Use this field for a more detailed description of the piece of equipment.
VIN / Serial #
The serial number or other identifying numbers or description may be entered here for the piece of equipment.
Year
Enter the model year.
Make
Enter the vehicle make.
Model
Enter the vehicle model.
Class Code
Often it is desirable to group several pieces of equipment according to the functions they perform, by size or by another classification. The ‘Class Code’ is a five-character field which allows the grouping of the equipment into a classification that will later be used in generating management reports. An example would be requesting a report on all back hoes for cost and profitability comparisons. For further details, see Equipment Analysis Report.
License Plate
The License Plate number of the equipment may be entered here.
Location
The location of each piece of equipment may be entered. Examples of location may be job numbers, cities or states
License Code
The month of the license renewal should be entered here. This field is purely informative.
Current Meter Rating
Enter the current reading displayed on the vehicle's meter.
Certified ID
Select from the list if Certified Payroll Craft Codes to fill this field. If there is a code in this field, it will serve as a default for charging usage time to this piece of equipment during payroll timesheet entry.
Operator Employee ID
If a specific employee is usually the operator of this piece of equipment, enter the employee ID in this field. When Usage Logs are entered for this piece of equipment, the Employee ID field on the usage log will be filled with this Employee ID by default.
Idle equipment may be rented or leased for use by another party. In this case, it is desirable not only to track costs to that piece of equipment, but to track the income with which it is associated. When equipment is used on a job, the cost of that equipment is put into job costing as a debit (expense). In return, it is necessary for the system to credit the equipment for which job costing was debited. In a sense, the credit to the equipment is ‘income’ for that piece of equipment. Because the costs that are charged to a job will differ from the costs associated with use and maintenance of a piece of equipment, it is desirable to track equipment costs and the ‘income’ (or job expense) associated with the equipment.
Internal
The Usage column shows the information associated with internal usage of equipment.
Rental
The Rental column shows the information associated with equipment rented or leased to another party.
Unit Name
The unit name is a description of how the piece of equipment is tracked when entered into the usage log. Often heavy equipment is tracked by hours used and small equipment or trucks are tracked by miles. Since the method of internal usage and rental billing may differ, a field is supported for both Internal and Rental units.
Charge rate/Unit
As the equipment usage is entered in the usage log, the units used will be multiplied by the charge or rate per unit to calculate the total cost. Equipment log entry will always use the charge rates entered here for calculating the Gross Charge Amount for the log transaction. Even if the appropriate rate is a guess, one should always be assigned. Since internal rates are generally charged at a different rate than when the equipment is rented to other parties, a field is supported for both Internal and Rental purposes
Income Account
As equipment income is produced, the income must be tracked through a general ledger control account. Enter the General Ledger Income Account associated with this piece of equipment or press the lookup button and the General Ledger Accounts screen will come into view. Two fields are supported in the case that internal income is tracked differently than external (rental) income.
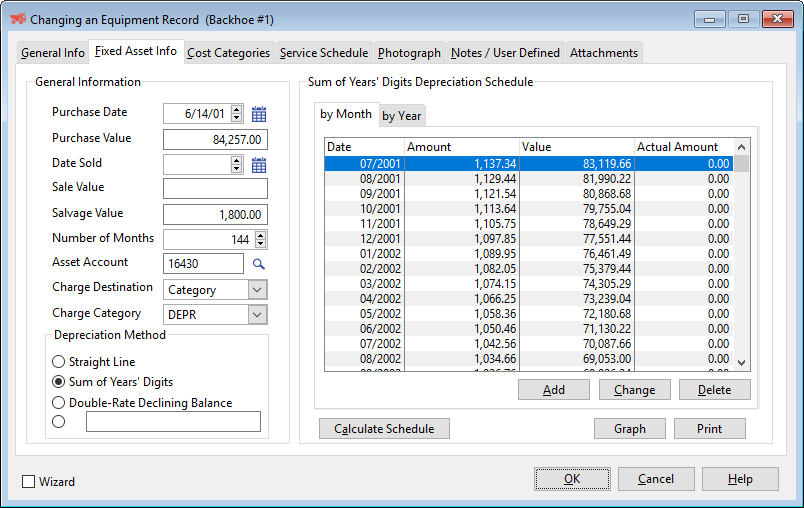
Purchase Date
Enter the date this piece of equipment was purchased.
Purchase Value
Enter the original purchase value of this piece of equipment.
Date Sold
Enter the date this piece of equipment was sold. No Depreciation Transactions can be created after this date for this piece of equipment.
Sale Value
Enter the sale value of this piece of equipment.
Salvage Value
Enter the expected sale value of this piece of equipment at the end of its useful life.
Number of Years
Enter the expected useful life of this piece of equipment.
Asset Account
Enter the account number where accrued depreciation costs will be credited. This is the Balance Sheet account that holds the value of the piece of equipment. Press the lookup button to select the desired account from the list of GL Accounts.
Charge Destination
Select None, G/L Account, or Category.
If a G/L Account selected, a Charge Account field will become available. Select the GL Expense Account or press the lookup button and select the account from the list of GL Accounts.
If a Category is selected, a Charge Category field will become available. This is a list of all the Cost Categories assigned to this piece of equipment through the Equipment Costing module. One of these cost categories may be called "Depreciation." Select the Depreciation Cost Category previously assigned to this piece of equipment. See the Equipment Costing topic for more information.
Select one of the following depreciation methods.
Straight-Line (radio button)
Selecting Straight-Line Depreciation will distribute the depreciation expenses evenly over the life of the piece of equipment. This method is best used for assets that are used evenly over their useful life.
Sum of Years' Digits (radio button) and Double-Rate Declining Balance (radio button)
Selecting either of these depreciation methods will cause larger depreciation expenses early in the asset's life and smaller amounts later in it's useful life. Consult an accounting professional for the tax benefits of each different depreciation method.
Custom (radio button)
Select the Custom method to manually enter a custom depreciation schedule that has been calculated outside the accounting software.
This area will display the Depreciation expenses by Month or by Year. If the by Month tab is selected, the Schedule will display Month, Amount, Value, and Actual Amount. If by Year is selected, the Schedule will display Year, Beginning Book Value, and Annual Change.
Add or Change (button)
Although it is not recommended, additional months can be added and each month's depreciation can be modified. Press the Add button to add a Month to the existing Depreciation Schedule or press the Change button to modify an existing month. For more information, see Add or Change a Depreciation Schedule Line Item.
Add or Change a Depreciation Schedule Line Item
If the Add of Change button is pressed, the following screen will come into view.
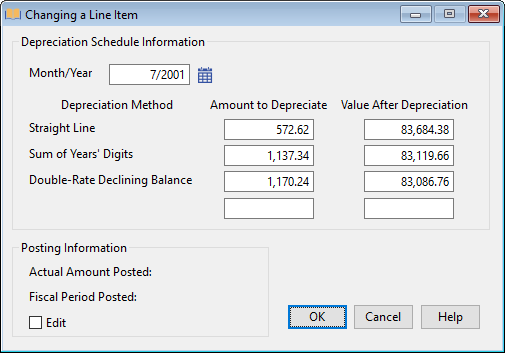
Depreciation Schedule Information
Month/Year
Enter the Month and Year for the Depreciation Line Item or press the lookup button and select the date from the Calendar.
Depreciation Method
The different Depreciation Methods are listed here.
Amount to Depreciate
The amount to Depreciate under each method is listed here. Edit the values to the desired amounts.
Value After Depreciation
The Asset Value after Depreciation is listed for each method. Edit the values to the desired amounts.
Actual Amount Posted
The actual amount of Depreciation expenses posted is listed.
Fiscal Period Posted
The fiscal period in which the Depreciation Expense was posted is listed here.
Press the Calculate Schedule button and the Depreciation Schedule will automatically be filled for all three automatic Depreciation Methods.
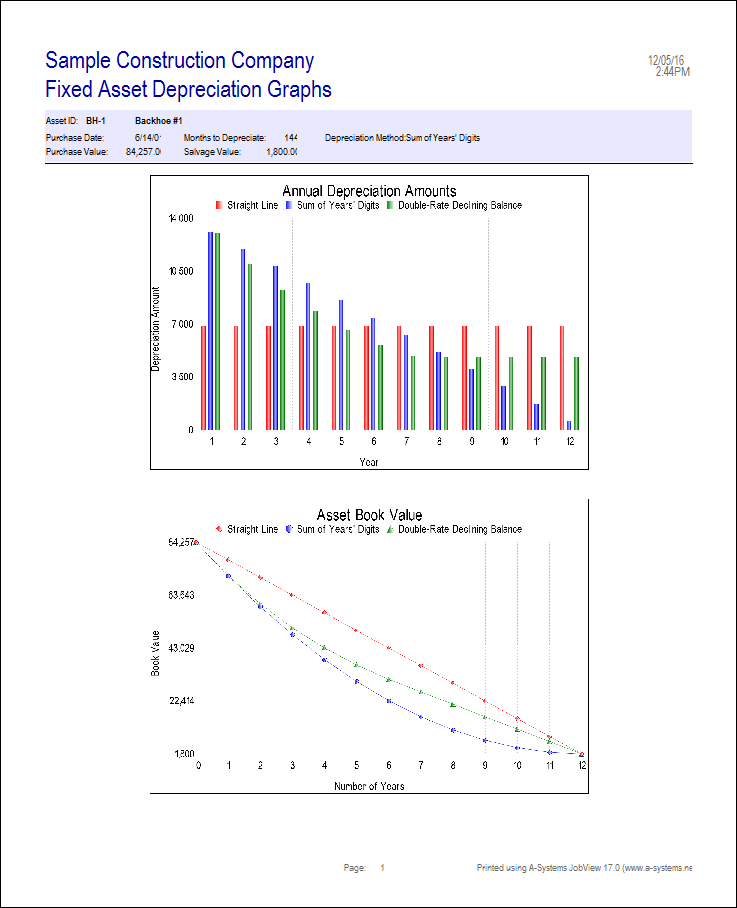
Press the Graph button and the following screen will come into view.
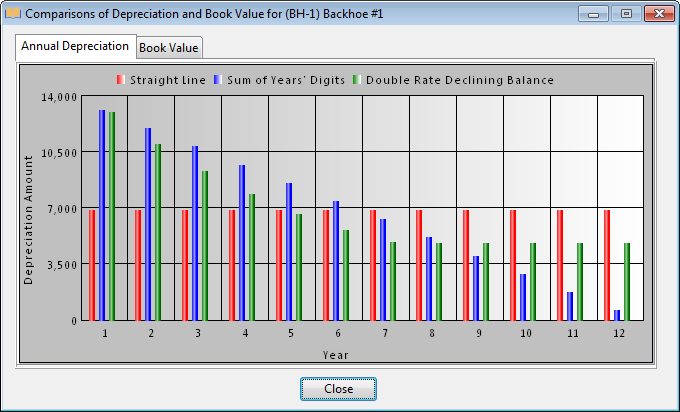
Annual Depreciation (tab)
This tab displays the Annual Depreciation costs for each method for the life of the asset.
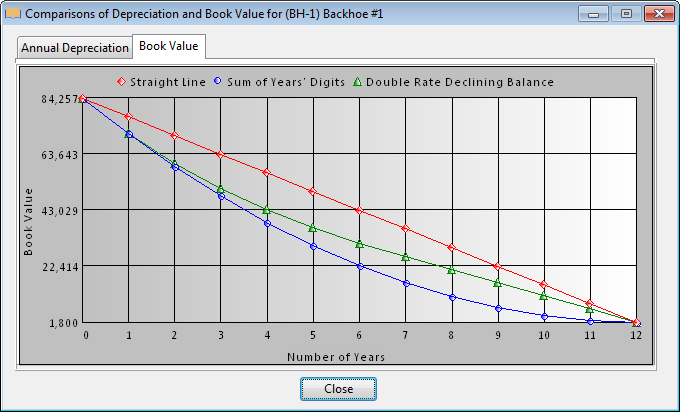
Book Value (tab)
This tab displays the Book Value of the asset over its expected life according to each Depreciation Method.
There are two types of reports available in the Fixed Asset module:
|
1. |
|
|
|
|
|
2. |
|
|
|
Press the Print button and the following screen comes into view.
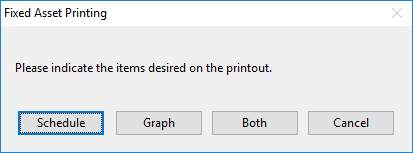
Schedule (button)
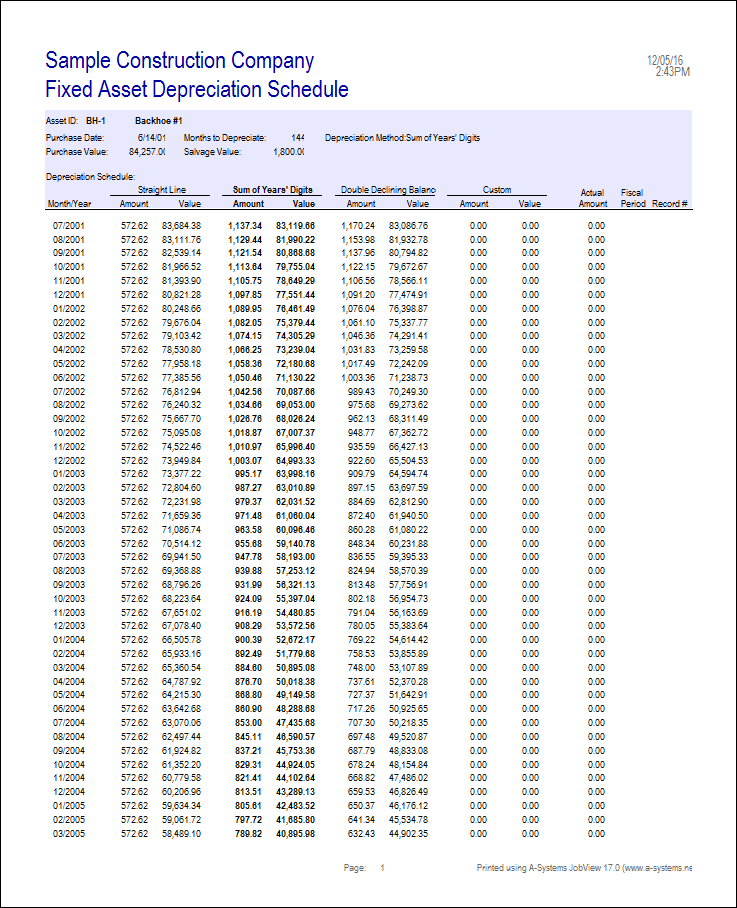
Press the Schedule button to print the Depreciation Schedule for this Fixed Asset.
Graph (button)
Press the Graph button to print the Depreciation Graphs for this Fixed Asset.
Both (button)
Press the Both button to print the Depreciation Schedule and Graphs for this Fixed Asset.
Cancel (button)
Press the Cancel button to return to the previous screen without printing.
Asset ID
The Asset ID and Description are listed here.
Purchase Date
The Asset Purchase Date are listed here.
Years to Depreciate
The number of years this Asset will depreciate or its useful life is listed here.
Depreciation Method
The currently selected Depreciation Method for this Asset is listed.
Purchase Value
The Purchase Value of this Asset is listed here.
Salvage Value
The Salvage Value of this Asset is listed here.
Depreciation Schedule
The different available Depreciation Methods are listed here. Information for the currently selected Depreciation Method for this Asset will be displayed in bold characters.
Month/Year
The Month and Year for each Depreciation Expense is listed here.
Amount
The Depreciation Expense for the Month is displayed here.
Value
The current Asset Book Value for the Month is displayed here.
Actual Amount
The Actual Depreciation Expense for the Month is displayed here.
Fiscal Period
The Fiscal Period in which the Depreciation Expense was posted is listed here.
Record #
The GL Transaction number for this Depreciation Expense is listed here.
Asset ID
The Asset ID and Description are listed here.
Purchase Date
The Asset Purchase Date are listed here.
Years to Depreciate
The number of years this Asset will depreciate or its useful life is listed here.
Depreciation Method
The currently selected Depreciation Method for this Asset is listed.
Purchase Value
The Purchase Value of this Asset is listed here.
Salvage Value
The Salvage Value of this Asset is listed here.
Once a piece of equipment has been setup, cost categories may be attached for tracking expenses against the piece of equipment. Press the Cost Categories tab and the following screen comes into view.
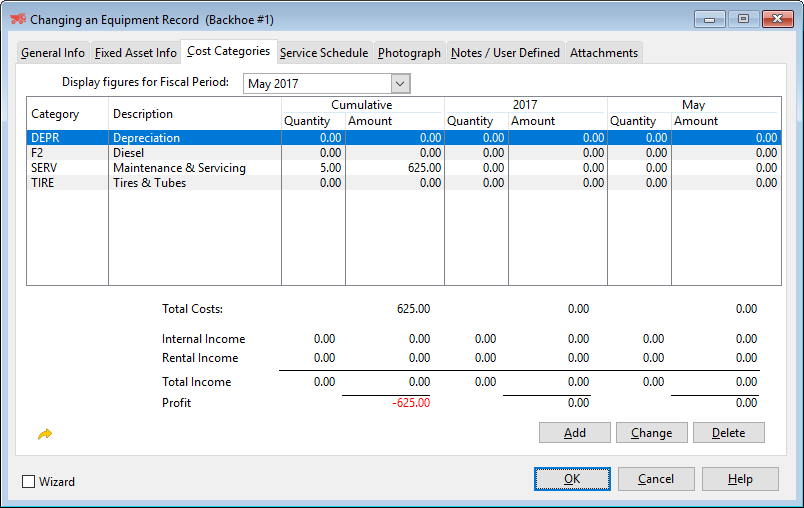
Category
The unit name is listed:
Description
Enter the unit name. For example: If the Category is GAS, the Description would be Gasoline.
Cumulative
This field contains the total expense for the selected cost category.
Year to Date
This field contains the expense for Year to Date for the selected cost category.
Month to Date
This field contains the expense for the selected cost category for the Month to Date
Press the Add or Change button and the following screen comes into view.
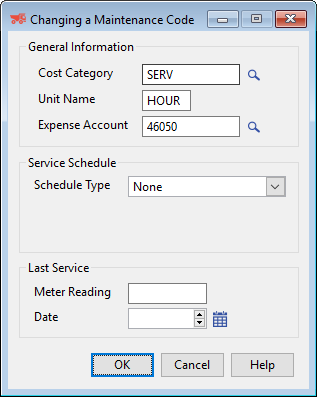
Cost Category
Pressing the lookup button on the Cost Category causes the Equipment Maintenance Categories screen to come into view. Highlight the desired category and press the Select button.
Unit Name
Enter the unit name. For example: If the Cost Category is GAS, the Unit Name would be gallons.
Expense Account
The Expense Account is so termed because the majority of transactions charged to an equipment cost category will be ‘debit’ transactions. Whenever any transaction is assigned to an ‘Equipment’ account, whether its origin is payables, payroll or general ledger, and regardless of its being a debit or a credit transaction, the system must also know the general ledger account to which the transaction should be assigned. The purpose of these fields is to specify the credit and debits accounts. The ‘Equipment ID’ and ‘Cost Code’ pair are the ‘Subsidiary Account’ for the transaction. The general ledger account or ‘Control’ account will be specified in this field.
Many different schemes may be used when setting up control accounts in the general ledger. The most simple scheme would be to have one account for ‘Equipment Operating Income’ and one account for ‘Equipment Operating Expense’ with the total being ‘Gross Profit - Equipment.’ Usually something a little more sophisticated is set up with separate accounts for ‘Internal’ and ‘Rental’ income and expenses broken down by type.
Each cost category and income category for a piece of equipment must be assigned to a specific control account based upon the accounts that have been created in the general ledger chart of accounts. The control account assigned in ‘Dictionary of Codes Entry’ will act as a default value that may be overridden during assignment of cost categories in ‘Equipment Master Entry.’ When costs (or credits) are charged to ‘Equipment’ cost accounts through payables, payroll or general ledger, the ‘Debit Control Account’ will be used to assign the transaction to a specific general ledger account (regardless of the ‘debit/credit’ status of the transaction). Control accounts for equipment usage and rental income are not assigned through this program but are set up during ‘Equipment Master Entry’ with tailored defaults.
Enter the account numbers or press the lookup button on the Expense field and the General Ledger Accounts will come into view. Highlight the desired account and press the Select button.
The user can enter service schedule information for each cost category attached to a piece of equipment. This information, combined with information recorded during cost postings, helps the computer determine when the service should next be performed.
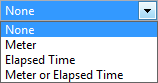
Schedule Type
Choose how service should be scheduled, by Meter, by Elapsed Time, by both, or None.
If Meter is selected, the following fields will be available for specifying either Miles or Hours.

Enter the desired number of Miles or Hours in the field and service will be scheduled for the desired interval.
If Elapsed Time is selected, the following fields will be available for specifying Months or Days.

Enter the desired number of Months or Days before which should be performed.
If Meter or Elapsed Time is selected, the user can specify when service should be performed base on either Meter readings or Elapsed Time. If no service is to be scheduled for this equipment, select None from the dropdown menu.
Meter Reading
Enter the Meter Reading taken at the Last Service
Date
Enter the Date the Last Service was performed or press the lookup button and select the date from the Calendar.
Press the Service Schedule tab and the following screen comes into view.
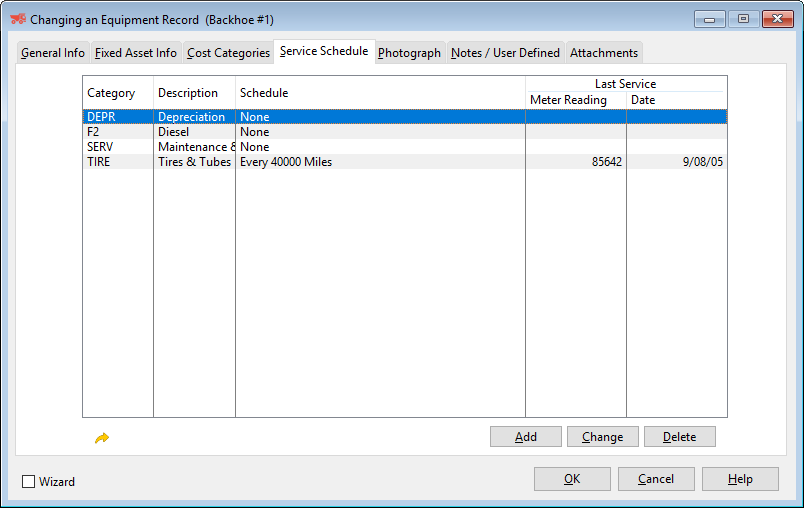
This tab shows the Service Schedules for each piece of equipment and when each was last serviced. For information on modifying or creating a new service schedule, see Adding or Changing a Maintenance Code.
Press the Photograph tab and the following screen comes into view.
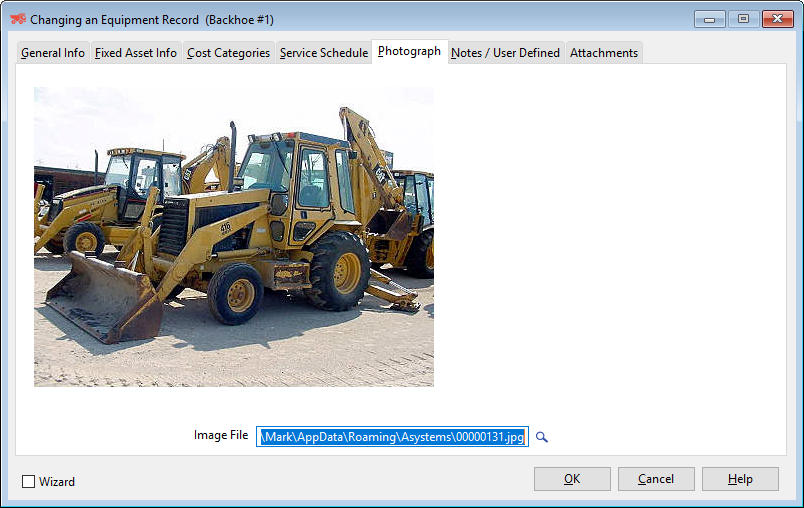
To Add a Photograph, press the lookup button and choose the correct image file name and press the OK button. In order to have an image file available, it will be necessary to have photographs scanned and saved. This process and technology are separate from this accounting software.
Press the Notes / User Defined tab and the following screen comes into view.
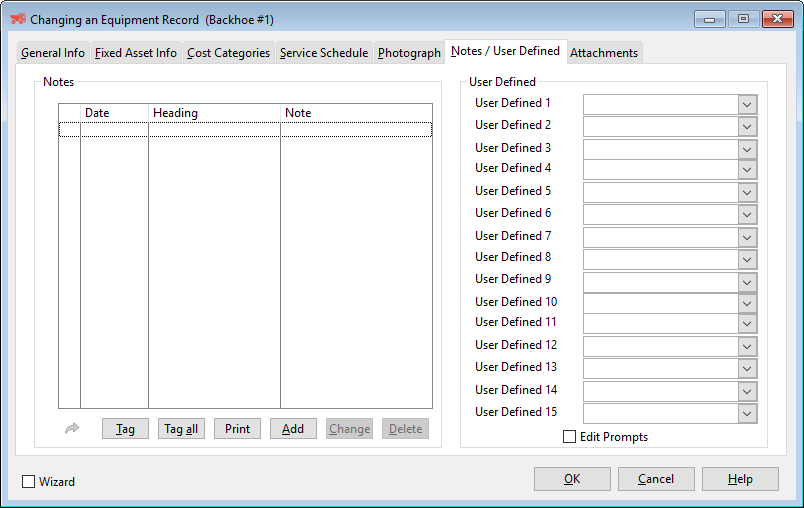
Notes
Use these fields to enter any pertinent notes for this piece of equipment.
User Defined
Each of these ten fields are user definable. Click on Edit Prompts to change the Labels on the prompts.
Press the Attachments tabs and the following screen comes into view. This tab allows the user to attach outside files to the equipment record. For example: a scanned copy of a bill of sale for this piece of equipment can be attached.
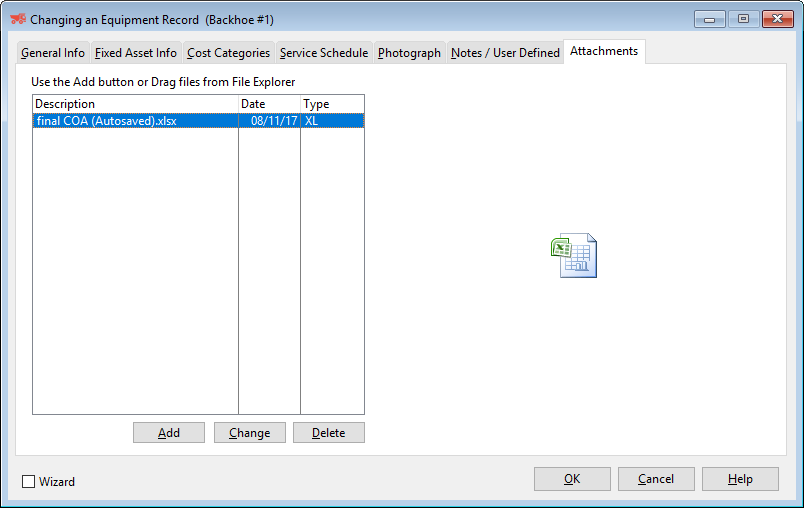
See the Attachments topic for a full description of how attachments work.