![]() Payroll Timesheets
Payroll Timesheets
This screen is accessed through either the Timesheets, Handchecks, or Voids menu option on the Payroll Main Menu. The entry cycle for Timesheet, Handcheck, and Void check entry follows the 5-Step Entry/Posting Cycle. Timesheets are entered, proof listed, and posted through the following screens.
Note: If this screen has an additional button, Import Electronic Timesheets, please refer to that section for further information on importing electronic timesheets from an external timesheet device.
For more information, see Batch Management
Change Dates in Tagged Batches (button)
This option allows the user to change the dates for all timesheets included in the tagged Batches. For more information, see Change Dates in Tagged Batches.
Proof List Tagged Batches (button)
This option allows the user to print a proof list for all timesheets included in the tagged Batches to verify the information from the Timesheets before final posting occurs. It is recommended that the proof listing be run each time before posting timesheets since it is much easier to correct mistakes before posting than after. For more information, see Timesheet Proof Listing.
Post Tagged Batches (button)
This option allows the user to post all timesheets included in the tagged Batches. For more information, see Post Tagged Batches.
Timesheets included in Batches
Depending on the tab selected, the Timesheets included in the Batches are listed either by Employee or by Job number.
Import (button)
see Setup Payroll Electronic Timesheet Interface
Export (button)
When the Export button is pressed, the following screen comes into view.

This option allows the user to save the timesheets in any Batch as a text file. Enter the desired filename in the space or press the lookup button and browse for the desired file. If the Preview the text file before closing check box is selected, the text file will be opened when the Proceed button is pressed. Press the Proceed button when the file name is entered or selected and the accounting system will save the timesheets in .txt format.
When the Holiday Pay button is pressed, the following screen comes into view.

This procedure will create a holiday pay timesheet for a selected group of employees. Use the settings in the General section to indicate the date of the holiday, the number of hours to be paid, and the GL Account the holiday pay will be charged to. Use the options in the Timesheet Type section to indicate what kind of timesheet is to be created. Tag the desired employees in the employee list. Click the Proceed button to create the timesheets.
Add or Change (button)
The tab selected will determine the screen that appears when the Change or Add button is pressed. If the by Employee tab is selected, the Timesheets by Employee screen will come into view. If the by Job tab is selected, the Timesheets by Job. screen will come into view. To Add a new timesheet, press the Add button. To Change an existing timesheet, highlight the desired employee or job and press the Change button.
Press the Delete button and the following screen comes into view. Press the Yes button and the highlighted record will be deleted and the previous screen comes into view. If the No button is pressed, the program returns to the previous screen.

This button closes the program and returns to the main screen.
Help (button)
see How to use Help
"This Batch is in Use by another user" message
This message will come into view anytime there is someone in the Batch or the accounting system is shut down improperly.

If this message occurs and there is someone in the Batch, press the OK button.
If this message occurs and there is no one in the Batch, press the letter "O" key and it will override this message and allow access to the Batch.
Change Dates in Tagged Batches
At times it becomes necessary to change the dates of unposted timesheets within a Batch. This is usually the case when it is a repeating Batch and the timesheets contained in the Batch need to posted to a new month. The Change Dates in Tagged Batches button effects a global date change on all timesheets or selected timesheets within the tagged Batch(es). Press the Change Dates in Tagged Batches button and the following screen comes into view.

This selection field allows the selection of the employees whose timesheet dates should be changed. The number of the first and last employees desired should be entered. If information is desired for only one employee, that employee number should be entered in both the From and To fields.
Select Employees (check box)
Activates the ranges defined on the next lines. This option may be used to limit the customers or print one customer.
From
Enter the first employee number or press the lookup button. The Employees screen comes into view. Highlight the desired employee and press the Select button.
To
Enter the last employee number or press the lookup button and the Employees screen will come into view. Highlight the desired employee and press the Select button.
Select Dates (check box)
Activates the ranges defined on the next lines. This option may be used to limit timesheets to a particular date or range of dates. To limit timesheets to a particular range of dates, enter the first and last dates of the desired range. To limit timesheets to a single date, enter that date in both the From and To fields.
From
Selects the first date in a range of dates or a single date. Enter the date or press the lookup button and a Calendar will come into view. Highlight the correct date and press the OK button.
To
Selects the last date in a range of dates or a single date. Enter the date or press the lookup button and a Calendar will come into view. Highlight the correct date and press the OK button.
The following two options are available. The option chosen will affect the next field.
Add a number of days to each timesheet date (radio button)
This field will affect all the timesheets in the tagged Batch or Batches. Specify the Number of Days to Add. This will add the specified number of days to the Timesheet Date of all timesheets that meet the requirements on this screen.

Change to a specific date
This field will affect all the timesheets in the tagged Batch or Batches by changing all Timesheet Dates to a specified date. Press the lookup button and a Calendar will come into view. Highlight the desired date and press the Select button.

Change to a specific Pay Period End date
This field will affect all the timesheets in the tagged Batch or Batches by changing all Timesheet Dates to a specified Pay Period End date. Press the lookup button and a Calendar will come into view. Highlight the desired Pay Period End date and press the Select button.

Chage Timesheet Dates Accordingly (check box)
Checking this box will change the timesheet dates of the individual timesheets in the batch. For example, let's say the current pay period end date is 10/15/12 and it is being changed to 10/18/12. This means 3 days are being added to the pay period end date. If the box is checked, all the timesheets in the batch will have 3 days added to their timesheet dates. If the box is not checked, the individual timesheets will retain their dates and only the pay period end date will be changed.
Payroll Posting is the heart of the entire payroll system. It turns timesheets and handwritten paychecks into useful management information, updates multiple files, and performs countless complex calculations that would be extremely time-consuming if done by hand.
For many construction companies, payroll is by far the most complex accounting procedure. Often this is the main factor in the company’s decision to purchase an accounting system. Union requirements, government reporting, multiple crafts and wage rates, multi-state tax calculations, and other complexities can all add up to make manual payroll a real headache.
Payroll does away with the manual calculation of all these items and produces detailed posting reports as it proceeds with the posting.
Backup Your Data
Always make a Backup of the data before beginning the posting as insurance against any kind of system failure. Proof listings of both timesheet and Handchecks Batch files should also be run and checked for accuracy before posting takes place.
Preparation for New Year
Before the first posting of a new year is run, Year-to Date fields in the employee records should be zeroed.
Description of Posting Program
Tag the Batches of timesheets which are to be posted. For a description of the Batch entry system, refer to Batch Management. When the proper Batch has been selected, press the Post Tagged Batches button and the following screen comes into view.
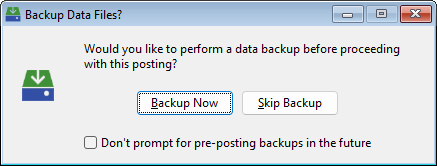
Backup Now
Click Backup Now button and the Utilities Backup/Restore screen will come into view.
Skip Backup
Click the Skip Backup button to skip the backup and continue to the next screen.
Don't prompt for pre-posting backups in the future (check box)
Check this box to turn this prompt off for future postings. To turn the prompt on again, see Setup: Preferences.
Posting Control Window
After the backup has been completed, the following window will come into view:

The last fiscal period used by the posting program will be automatically added. To change the fiscal period, enter the correct fiscal period or press the lookup button and the Fiscal Period Maintenance screen comes into view. Highlight the desired fiscal period and press the Select button. The Fiscal period will be displayed after the lookup button. When the displayed fiscal period is correct, press the Proceed with Posting button.
Special Setting for Timesheets Posted in December
If the timesheets are being posted in December, the window will look like this:

Notice how the system asks whether paychecks will be posted to December or January. Quarter to-date and Year to-date totals for tax purposes are accumulated based on the date the employee is actually paid. For this reason, the system must know at the time of timesheet posting whether the checks for this posting will be printed in December or in January. This will help the system determine whether to add to This Year's totals or Next Year's totals.
The system will post the timesheets in the tagged Batches. Four Summary Reports will print: 1. Payroll Posting Summary 2. Payroll Posting Detail 3. Payroll Posting Summary of Accruals and 4. General Ledger Summary of Payroll Posting.
After the posting process is finished and all reports have been printed, the following screen comes into view.

Finish (button)
Press the Finish button to make the posting permanent.
Undo (button)
Press the Undo button to return all accounting data to the conditions prior to posting.
Posting Process
As the posting proceeds, a number of messages will be displayed on the terminal. Payroll Posting completes numerous processes including calculation of tax withholdings, deductions, union fringes, worker's compensation, and other accruals. This is also the point where the accounting system may convert some of an employee’s hours to overtime hours depending on the Payroll settings for handling of overtime.
The system will produce five posting reports (and possibly a sixth depending on Miscellaneous Payroll Settings). The six different reports are described below.
|
1. |
|
|
|
|
|
2. |
|
|
|
|
|
3. |
|
|
|
|
|
4. |
|
|
|
|
|
5. |
|
|
|
|
|
6. |
|
|
|
The first report produced is the Payroll Summary. This is a one-page listing which provides totals for the entire posting. These totals include Gross Pay, Other Income, Union Accruals, Tax Withholdings, Standard Deductions, Cost Distributions and Company Tax Liabilities.
Next, the system produces a report which itemizes each employee’s Gross Pay, Deductions, Net Pay, Accruals and Timesheet Detail. This listing contains all the information for the current week as well as the year to-date.
3. Payroll Posting Summary of Accruals
This report breaks down the company’s liabilities accrued as a result of this payroll posting. Using this report, the company can determine how much is owed for Federal, State and Local Taxes, Social Security, Medicare, Federal and State Unemployment, Worker’s Comp, and other accruals. The accruals are broken down by Job Costs, Equipment Costs and Overhead.
4. Worker’s Compensation by State and Rate
This report further breaks down the worker’s compensation owed for each state and each worker’s compensation rate within that state. The Payroll Posting Summary of Accruals Report and the Worker’s Compensation by State and Rate Report are printed on the same page.
5. Job Cost Summary of Payroll Posting
This is a listing which provides Job Costs summaries for each job affected by the posting. The budgeted amount, current amount and the amount for this posting are listed. Individual Job Totals are listed with the Grand Total for all Jobs listed at the bottom of the report.
6. General Ledger Summary of Payroll Posting
The final report shows the activity which reached the General Ledger Transaction File as a result of this posting. Each credit and debit transaction is listed with its unique reference number, description, check number (if any), journal line number and amount. This information is permanently stored in the transaction file and may be retrieved at a later date using General Ledger reporting.
File all printouts produced by the posting as soon as possible. They are EXTREMELY important for auditing purposes and should NEVER be thrown away.
Report Sample- Payroll Posting Summary

Report Sample- Payroll Posting Summary of Accruals

Report Sample- Worker’s Compensation by State and Rate

Report Sample- Payroll Posting Detail

Report Sample- Job Cost Summary of Payroll Posting

Report Sample- General Ledger Summary of Payroll Posting

