![]() Accounts Payable: Sales Tax Report by State
Accounts Payable: Sales Tax Report by State
The Sales Tax Report by State option on the Accounts Payable Report Menu is used to obtain Sales Tax totals for a given range of dates for a given state. This report can be helpful in reporting to the state taxation authority how much sales tax was paid on all invoices incurred during the selected time frame. After selecting Sales Tax Report by State, the following screen will come into view.

Click on any column header to sort the listed items. This will be useful when the list of reports has grown.
Insert or Change (button)
To modify the information used in generating the report, press the Insert button or highlight the desired report title and press the Change button. For more information, see Insert or Change a Sales Tax Report .
Press the Delete button and the following screen comes into view. Press the Yes button and the highlighted report will be deleted. If the No button is pressed, the program returns to the previous screen.

To print a report, press the Print button. For more information, see Printing Reports.
Note: If the message "Nothing to Print" comes into view when the Print button is pressed, there are two main causes:
1. There is no information within the selected limits. Remove all limits, then, one at a time, reinsert the limits. If the report still will not print, insert a new report title.
2. No report title is selected. The report title is used to store the selected limits. A report title must be selected in order for the report to print.
This button closes the program and returns to the main screen.
Help (button)
see How to use help
Insert or Change a Sales Tax Report
To Insert or Change a report, press the appropriate button and the following screen will come into view. This screen displays the possible limits that may be set. No limits should be set if a complete listing of all invoices for all states is desired. Several limits may be set to narrow the list down to a very small range of invoices.

Following is a description of each of the limits. Check the appropriate boxes and enter the desired limits. When all desired limits have been set, press the OK button to save the settings. Press the Cancel button to return to the browse screen without saving the settings.
The title of the report. Warning: The title is used to store the selected limits. If no title is entered for the report, the message "Nothing to Print" will come into view when trying to print the report.
User
Enter the User ID of the report creator.
Lock (check box)
If this option is selected, only the User listed in the User field can change or delete this report.
This section allows the selection of Vendors for which the report should be printed.
All, Range, List (radio buttons)
Select the All radio button to ignore Vendor reporting limits. Select Range to enter a range of Vendors in the From and To fields. Select List to report on a list of selected Vendors.
These fields will be available if the Range radio button is selected.
From
Enter the vendor number (name) or press the lookup button and the Vendors screen comes into view.
To
Enter the vendor number (name) or press the lookup button and the Vendors screen comes into view.
Edit Vendor List
Click the Edit Vendor List button to add or remove Vendors from the list of Vendors to be included in the report. The following screen will come into view.
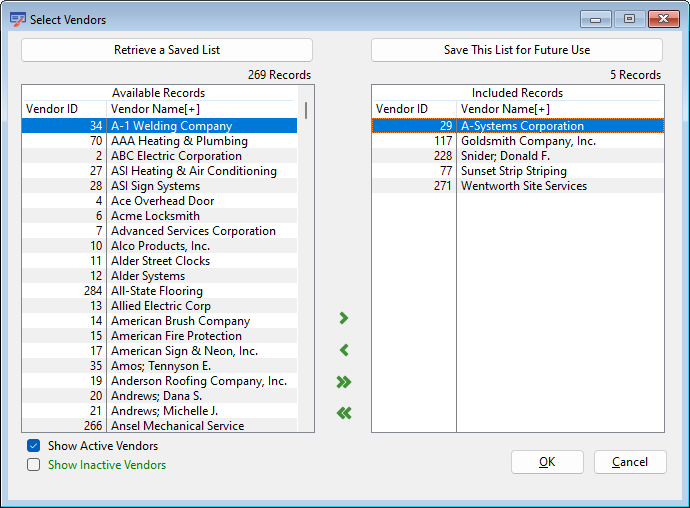
Retrieve a Saved List / Save This List for Future Use (buttons)
Use these buttons to save the current list of included records for future use, or to retrieve a previously saved list. See Saved Report Limit Lists for more details.
Available Records
All Available Vendors that are not included in the list are displayed in these columns.
Included Records
All Included Vendors are listed in these columns. Use the arrows to move selected records or all records between the Available and Included areas
Skip Inactive Vendors
Indicate whether inactive vendors should be included or excluded from the listing.
If the Select Dates box is checked, only invoices with a Paid Date within the supplied range of dates will be printed.
Selects Dates (check box)
Selects the dates to be reported on if this box is checked. Specify the dates in the From and To box by clicking on the lookup button. A Calendar will come into view. Highlight the desired date and press the OK button.
Choose one of the following two options.
Invoice Date (radio button)
Select this option to have the invoices on the report sorted in Invoice Date order.
Vendor Name (radio button)
Select this option to have the invoices on the report sorted in Vendor Name order.
Portrait (radio button)
Specifies how the report is positioned on the page when printed. Portrait is the standard. Portrait is printed vertically.
Landscape (radio button)
Specifies how the report is positioned on the page when printed. Landscape is printed horizontally.
Summary (radio button)
This format will print one line item for each invoice.
Detail (radio button)
This format will print a line item for each invoice plus one line for each invoice line item (for trade invoices).
States to Include (pull-down list)
Select the state for which the report is to be printed. The report will be limited to invoices from vendors whose mailing address includes the selected state. Select All States to include invoices from vendors in any state.
Readability Bars (check box)
Select this option to add Readability Bars to the generated Report. Click the color box to select the Readability format. The following screen will come into view.

Select the Readability Bar color or press the Define button to select a Custom Readability Bar color.
Use this section to limit the report by Job. Use the Range setting to set a range of Job ID numbers. Use the List setting to specify a list of Jobs to be included.
All, Range, List (radio buttons)
Select the All radio button to ignore Job reporting limits. Select Range to enter a range of Jobs in the From and To fields. Select List to report on a list of selected Jobs.
These fields will be available if the Range radio button is selected.
From
Selects the first job in a range or a single job. Enter the number or press the lookup button and the Job setup screen comes into view.
To
Selects the last job in a range or a single job. Enter the number or press the lookup button and the Job setup screen comes into view. Highlight the desired record and press the Select button.
Edit Job List (button)
If the List radio button is selected, this button will be available. The following screen will come into view when the Edit Job List button is pressed.

Use the arrows to move Jobs from the Available list to the Included list. All Jobs in the Included Records section will be included on the report. Use the tabs to sort each section by Job Number or by Job Name.
All Invoice Types (radio button)
Report will include both Trade and Subcontract Invoices.
Trade Invoice Only (radio button)
Report will include Trade Invoices only.
Subcontract Invoice Only (radio button)
Report will include Subcontract Invoices only.
All Invoices (radio button)
Job will include all invoices, whether they have a Default Job assigned or not.
Job Invoices Only (radio button)
Report will only include invoices with a job listed in the Default Job field.
Non-Job Invoices Only (radio button)
Report will only include invoices with NO job listed in the Default Job field.
Load Defaults (button)
Press the Load Defaults button to reset the parameters for the selected Report. The original parameter selections will be loaded. Parameters that can be limited by list or range will be reset to allow All items. Other Parameters will reset to their default values.
Click this button to save the current settings and print the report immediately, without having to return to the Report Title browse window.
Report Description - Sales Tax Report by State
The report includes a list of all the invoices that fall within the specified report limits. For each listed invoice, the report includes the Vendor ID and Name, Invoice Number, Invoice Paid Date, Invoice Description, Invoice Amount, and Tax Amount. The Invoice Amount and Tax Amount columns are totalled for each state and once again for the entire report (if more than one state is included).
Report Sample - Sales Tax Report by State
